TABLE OF CONTENTS
- FUNCTIONAL DESCRIPTION
- DISPLAY GRAPH MODE
- DISPLAY TABLE MODE
- PUSHBUTTON
- CHANGING DISPLAY MODE
- CHANGING TIMESCALE
- CHANGING HEIGHT UNITS
- THEME OPTIONS
- CLEARING HISTORY RECORDS
- FACTORY RESET
- BATTERIES
- SYSTEM MESSAGES
- CAUTION
- MOUNTING INSTRUCTIONS
- LIMITED WARRANTY
- SPECIFICATIONS
- WAVE GROWTH NOMOGRAM
- PACKAGE CONTENTS
FUNCTIONAL DESCRIPTION
The Steamrock SWR-1 sea wave recorder detects and records changes in sea surface conditions. It displays current significant wave height, a graph showing changes in that wave height over time for swell and wind waves, and apparent wave period and its changes.
In addition, the maximum wave height and magnitude of accelerations are detected and recorded.
The device analyzes the boat motion during measurement interval and calculates the wave height and period for this interval, whose duration depends on the chosen timescale.
Results are shown on a high contrast sun readable e-paper display and stored in a built-in memory. The Steamrock SWR-1 is a standalone device that does not require software updates, an internet connection, or an external power supply. It operates on three AA batteries, with the remaining charge displayed using a battery icon and percent number.
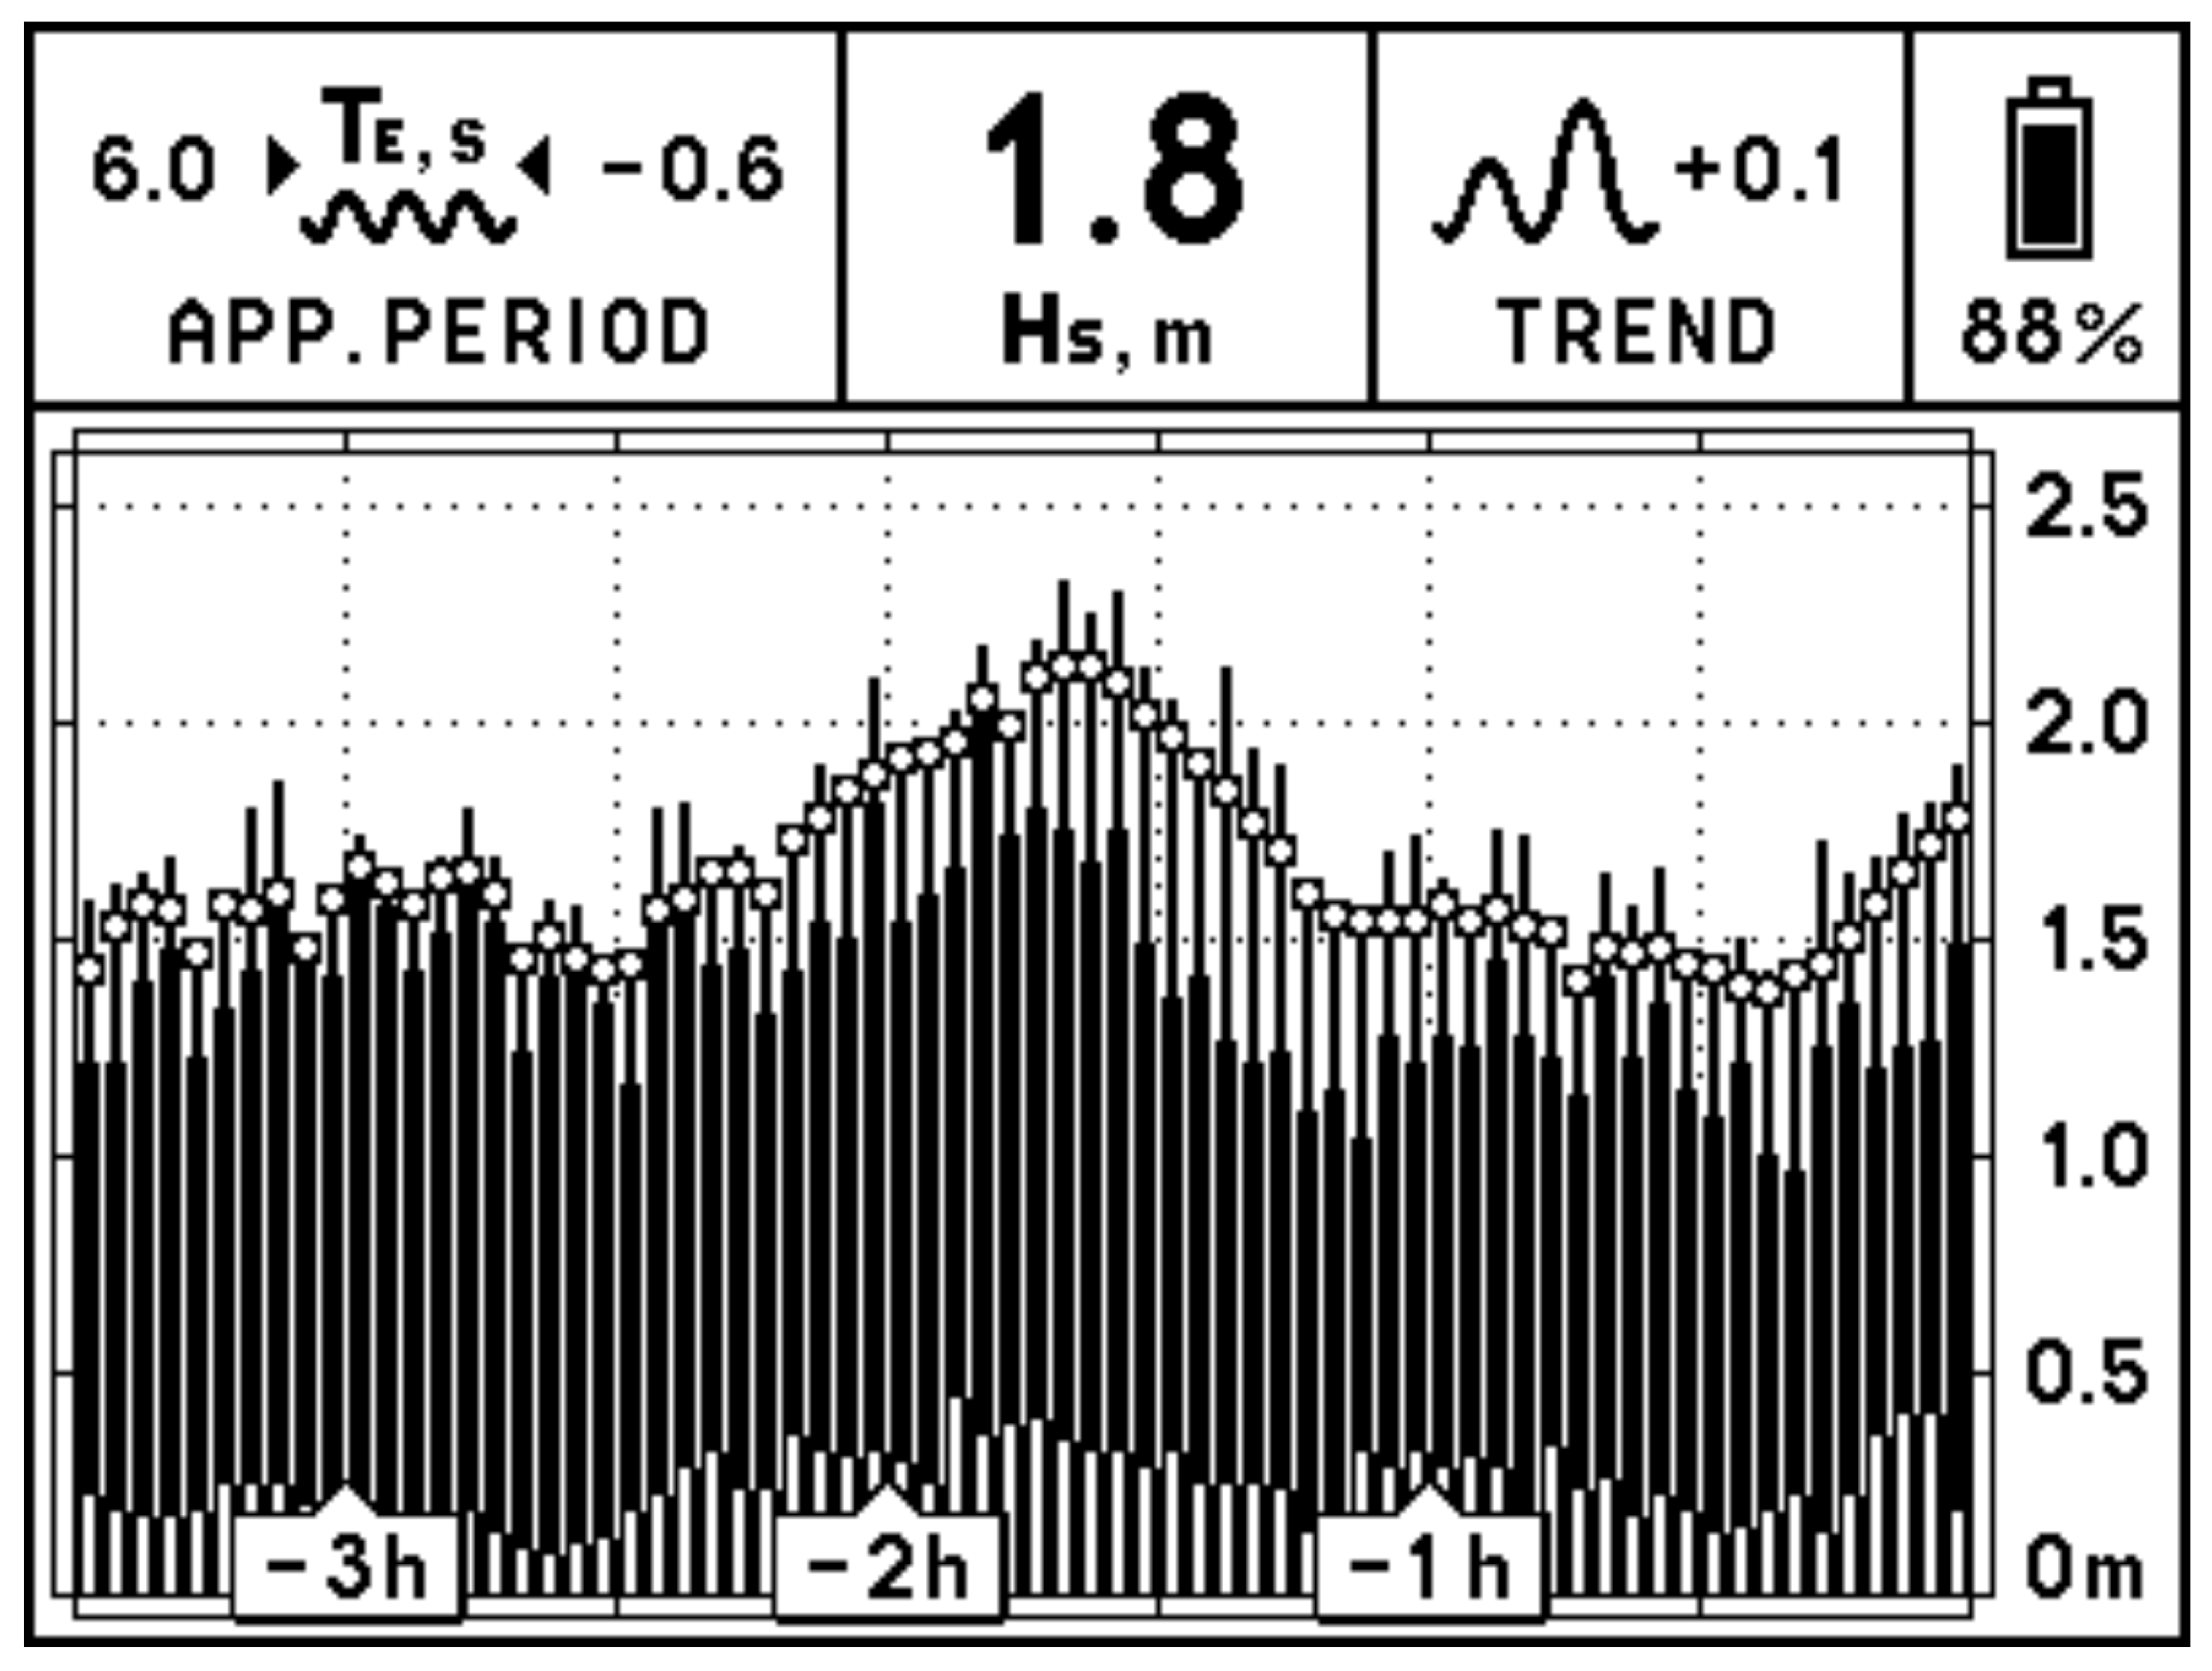
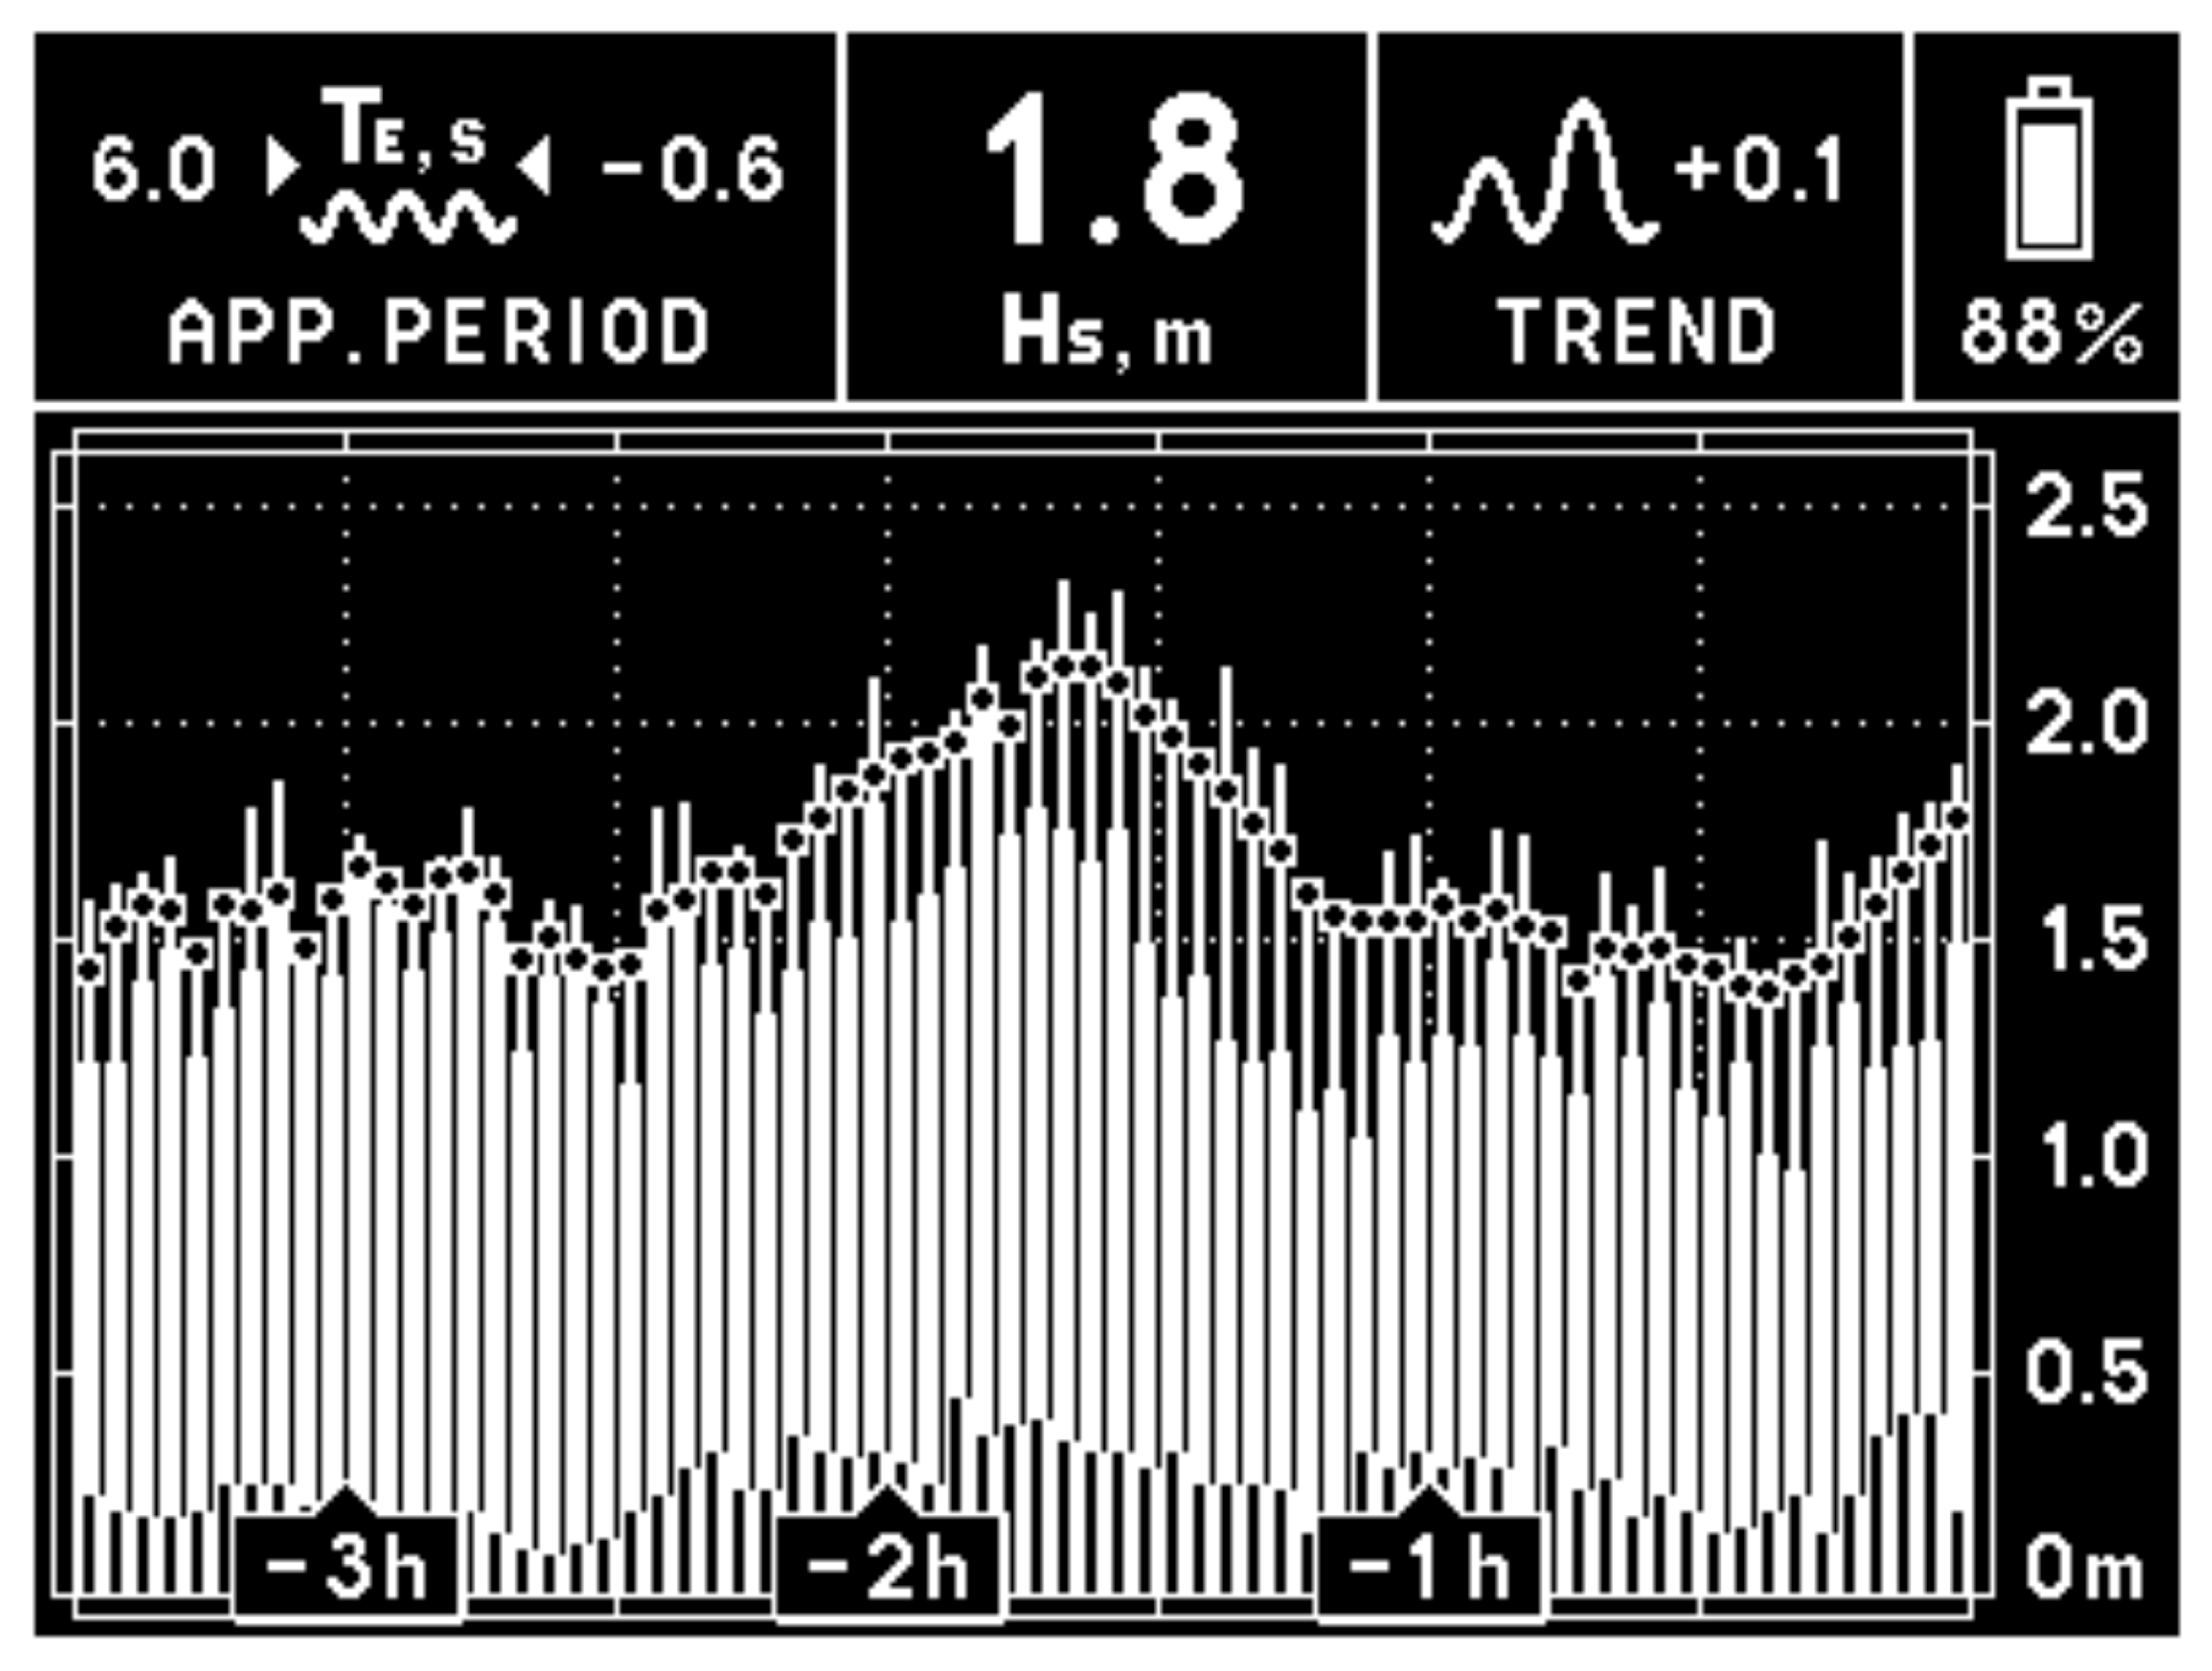
DISPLAY GRAPH MODE
In this mode, the device will display the sea wave data in graphical form.
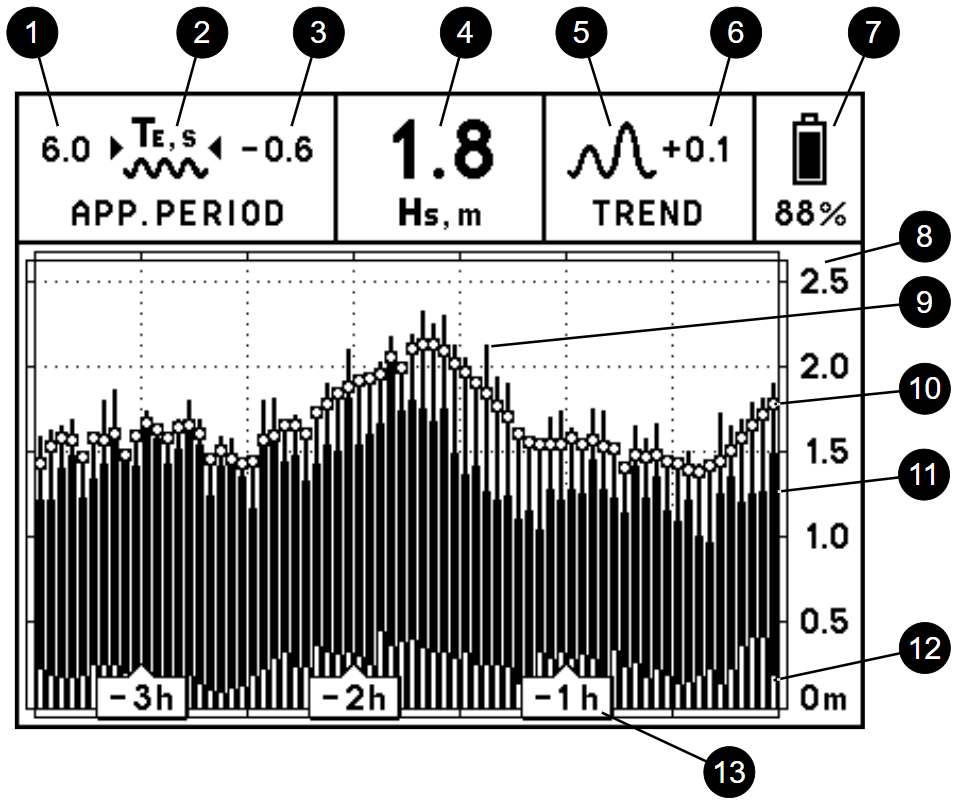
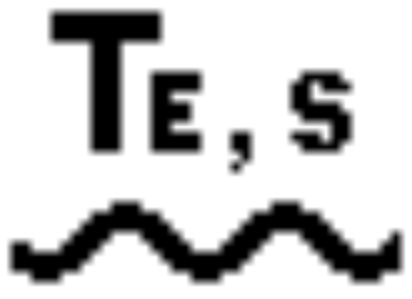
- Wave Period Value (Te, seconds)
Te (T energy) stands for a wave period, whose value is derived from wave energy spectrum evaluation during the measurement interval.
Steamrock SWR-1 calculates true Te when the boat is docked or adrift. When the boat is making its way through the waves, the device calculates apparent wave period value, which is smaller than true Te for the head sea and larger than true Te for the following sea. - Te Trend Symbol
Depicts the trend of apparent wave period change in the past 30 minutes, as described below:
-
 Te change did not exceed 5% or 0.1 s, whichever was greater
 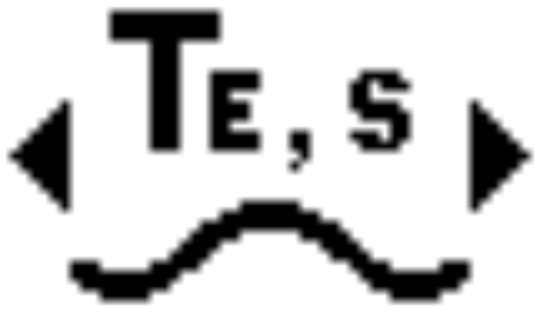 Te increased by more than 5% or 0.1 s
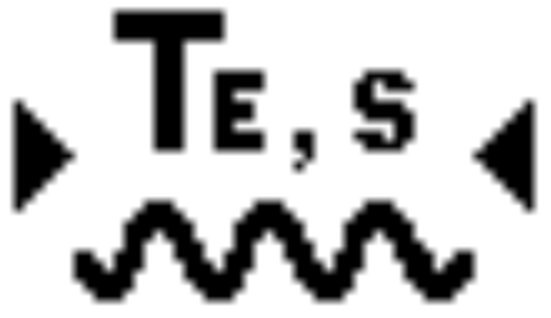 Te decreased by more than 5% or 0.1 s
-
- Te Change Value
Represents the difference between apparent wave period now and 30 minutes ago. A positive number indicates that the Te is now greater than before; a negative number indicates that it is now smaller. If, for any reason, this number exceeds ± 99 s, the symbol “>99” will replace the numbers. - Significant Wave Height Value (Hs, meters or feet)
Hs stands for significant wave height (the average wave height of the highest third of the waves in terms of World Meteorological Organization), whose value is derived from wave energy spectrum evaluation during measurement interval. - Hs Trend Symbol
Depicts the trend of significant wave height change in the past 30 minutes, as described below:
 Hs change did not exceed 5% or 0.1 m (≈ 0.33 ft), whichever was greater
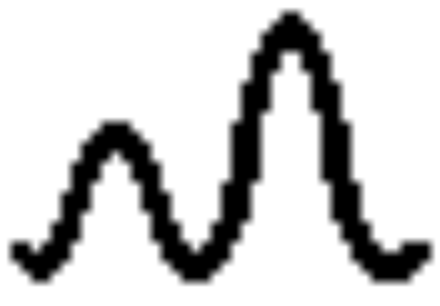 Hs increased by more than 5% or 0.1 m (≈ 0.33 ft)
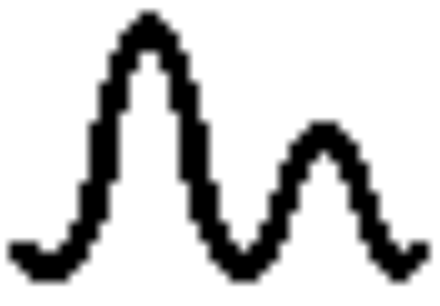 Hs decreased by more than 5% or 0.1 m (≈ 0.33 ft)
- Hs Change Value
Represents the difference between significant wave height now and 30 minutes ago.
A positive number indicates that the Hs is now greater; a negative number indicates that it is now smaller. - Battery State
A battery icon and a percentage value provide information on the level of battery charge. Refer to BATTERIES section for details. - Wave Height Scale
The wave height scale adjusts automatically to fit the graph to the screen, depending on the maximum wave height detected. - Maximum Wave Height
The thin bar represents the maximum wave height detected during a particular measurement interval. - Significant Wave Height
This mark depicts the calculated current Hs value. The same marks on the older bars depict Hs averaged in a way that takes neighboring values into account. - Wind Wave Height
The height of the thicker bar represents the contribution of wind waves to the total wave height displayed. - Swell Wave Height
The height of the overlapping bar represents the contribution of swell to the total wave height displayed. - Timescale
There are five timescales for which the full width of the graph represents 3.5, 7, 10.5, 18, or 24.5 hours of data. Each of the 70 vertical bars on the graph represents the measurement interval of 3, 6, 9, 15, or 21 minutes, corresponding to chosen timescale.
DISPLAY TABLE MODE
In this mode, the statistical data for maximum detected wave height, significant wave height, along with vertical and horizontal accelerations will be displayed in table form.
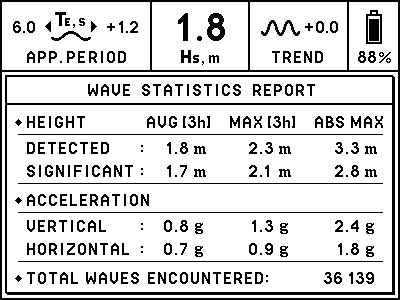
Each parameter data is displayed for the average (AVG) and maximum (MAX) values during the time shown in square brackets, and for the absolute maximum (ABS MAX) values detected by the device throughout its use. Additionally, the total wave count is displayed.
PUSHBUTTON
There is a pushbutton on the bottom side of the device. Under normal operating conditions, there is no need to use the pushbutton because the wave height scale and graph will be automatically selected. This pushbutton is used for:
- changing display mode
- changing timescale
- changing height units
- changing theme
- clearing history records
- factory reset

Please refer to the appropriate sections for details.
CHANGING DISPLAY MODE
To change the display mode, press and hold the pushbutton. You will hear a short beep in less than a second. When you hear it, release the pushbutton. After the pushbutton is released, the new mode will be displayed. If you prefer the previous mode, just repeat this procedure.
CHANGING TIMESCALE
To change timescale, press and hold the pushbutton. You will hear a short beep in less than a second. Continue holding the pushbutton for 3 seconds. When you hear a double beep, release the pushbutton. After the pushbutton is released, the next timescale will be displayed. If you prefer another timescale, just repeat this procedure.
Timescale sequence: 3.5h → 7h → 10.5h → 18h → 24.5h → 3.5h
CHANGING HEIGHT UNITS
The wave height can be displayed in meters or feet. To change the height units, press and hold the pushbutton. You will hear a short beep in less than a second. Continue holding the pushbutton for 3 seconds. You will hear a double beep. Keep holding the pushbutton down for about 3 more seconds. Release the pushbutton after three short beeps have been sounded. The height units will be changed.
THEME OPTIONS
There are two theme options: LIGHT and DARK. To change the theme, press and hold the pushbutton. You will hear a short beep in less than a second. Continue holding the pushbutton. Approximately 3 seconds later, you will hear a double beep, followed by a triple beep after about 3 seconds. Keep holding the pushbutton until you hear two double beeps, then release the pushbutton. The theme will be changed.
LIGHT Theme
DARK Theme
CLEARING HISTORY RECORDS
To clear the stored records, press and hold the pushbutton. You will hear a short beep in less than a second. Continue holding the pushbutton while various beeps sound, and release it when you hear a single long beep. It will take about 18 seconds in total. The screen will be updated, showing the flattened graph set at the smallest scale range. All stored history records will be erased.
FACTORY RESET
To reset the device, remove one of the batteries, press and hold the pushbutton, and reinsert the battery. You will hear a triple beep in less than a second. Continue holding the pushbutton for 6 seconds. When you hear a long beep, release the pushbutton. After this, the display will be updated, showing the QR code on a white background.
Remove all batteries if the device is not intended for use after factory reset. If you don’t remove at least one battery after factory reset, the device will restart automatically in 30 seconds.
BATTERIES
- Use high-quality batteries only. Panasonic EVOLTA AA alkaline batteries are recommended for this device.
- NiMH rechargeable batteries can be used, but the battery charge state (displayed on the screen) will not be correct, and the operating time will be shorter.
- Zinc-carbon batteries are not recommended for this device.
- Lithium primary batteries were not tested with this device.
- Replace all batteries at the same time. Do not mix old and new batteries, and do not mix different types of batteries or batteries produced by different manufacturers.
- When installing the batteries, be sure to observe the polarity marked in the battery holders. In this device, all positive terminals are up.
- When the battery charge falls near operating limits,you will see this icon in the upper right corner of the screen:
- When the battery charge falls below operating limits, you will see the warning message “REPLACE BATTERIES” on a blank screen. The device will also produce a beep to the tone of the Morse code letter “B” (–•••) once.
- When you see the “REPLACE BATTERIES” warning, replace or remove the old batteries as soon as possible. Leakage of the discharged batteries can cause permanent damage to the device.
- After removing the old batteries, wait one minute before installing new ones.
- When new batteries are inserted and the device is installed onto the mounting plate, it will automatically start self-calibrating. After successful calibration, the device will measure current sea wave parameters and display them on the screen along with the previous data. Note that it will take 30 minutes to get a fully accurate Hs / Te change value and trend symbols.
- No matter if the batteries are low or removed, the device will keep previous records and settings (timescale, height units, display color theme) in its internal memory. There may be a sudden discordant “step” on the graph if you replace the batteries a while after you have noticed the warning message “REPLACE BATTERIES” due to changes in sea surface conditions that have occurred during downtime.
- Before leaving the device unattended for a prolonged period of time, check the battery charge. If the battery charge is low, you may want to replace or remove the batteries to keep them from falling below operating limits while unattended and prevent battery leakage.
SYSTEM MESSAGES
The device might show one of six messages:
- “MOUNT THE DEVICE IN ITS PLACE”
The device is ready for installation. - “CALIBRATION IN PROGRESS”
The device is performing a self-calibration. - “GENERAL FAULT [XX]. REMOVE BATTERIES”
This message will be displayed when an internal error is detected. This error might be caused by electromagnetic interference or device failure. The device will shut down automatically. The error code will be shown in the square brackets. Try to install the device in another location. If this does not resolve the issue, remove the batteries and contact the manufacturer. - “TEMPERATURE BELOW OPERATING LIMIT”
This message will be displayed when the device temperature is below 0°C (32°F). The device will resume its measurements but won’t update the display. Once the temperature rises above 0°C (32°F), the device will resume displaying the data, including that obtained during the low-temperature conditions. - “TEMPERATURE ABOVE OPERATING LIMIT”
This message will be displayed when the device temperature is above 50°C (122°F). The device will resume its measurements but won’t update the display. Once the temperature falls below 50°C (122°F), the device will resume displaying the data, including that obtained during the high-temperature conditions. - “REPLACE BATTERIES”
This message will be displayed when the charge of the batteries falls below operating limits. No measurements will be taken while this message is displayed. It is strongly recommended that you replace or remove the batteries when this message appears. Refer to BATTERIES section of this manual for more details.
CAUTION
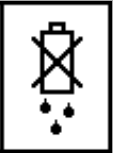
- This device was designed for indoor use only. Although the face of the device is generally splash-proof, it should not be exposed to rain or liquids from other sources, such as cleaning.
- Do not clean this device with chemicals, expose it to direct sunlight, or operate it below
0 °C (32 °F) or above 50 °C (122 °F). - Do not remove the batteries while the display is updating. This can cause display damage.
- Electronic paper displays do not need power to retain their images. Therefore, this device will continue displaying the last image on the screen even in the unlikely event of a malfunction or loss of power.
- In no case should this device be used as the sole basis for weather prediction or navigation decisions. The user assumes sole responsibility, legal or otherwise, for these decisions.
MOUNTING INSTRUCTIONS
It’s best to install and start up the device when it’s calm. The mounting location should be chosen as follows:
- Inside the cabin, as close to the boat’s center of mass as possible.
- Not closer than 1 meter to power cables, electrical equipment, radio transmitters, and other EMI sources.
- The mounting surface can be horizontal, vertical, or inclined, but it must remain fixed in relation to the boat’s hull.
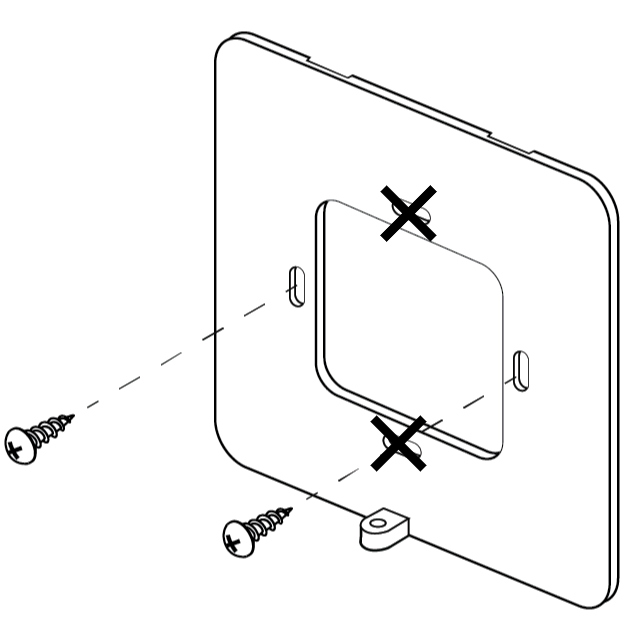
- Remove the mounting plate from the back of the device using the
provided Phillips mini screwdriver. - Using the two stainless screws provided and your own screwdriver, attach the mounting plate to the bulkhead or wall with its top indented slots facing the mounting surface and the bottom bracket with a threaded bolthole facing outwards.
ATTENTION: To avoid the risk of shorting the battery, do not use upper and lower holes; use left and right holes instead.
- Install the batteries. You will hear a short beep in less than a second. “MOUNT THE DEVICE IN ITS PLACE” message will be displayed.
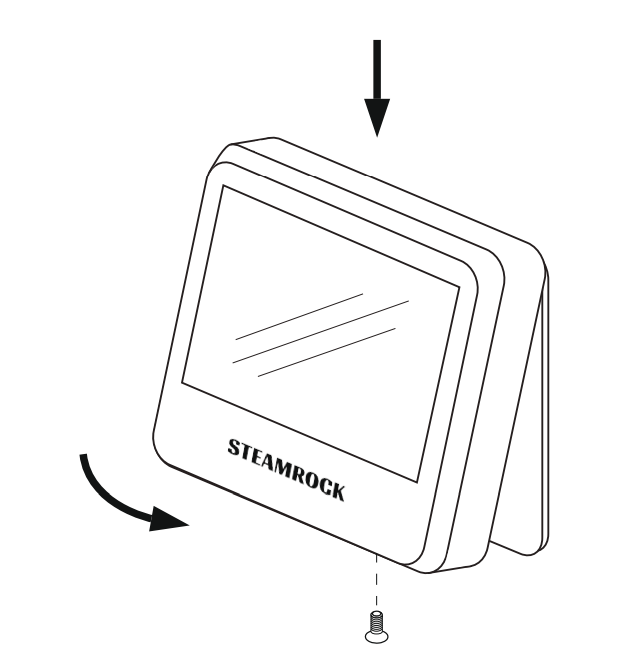
- Mount the device on the bulkhead or wall by inserting the small flat hooks on the top inner side of the casing into the mounting plate’s indented slots. Carefully push it in place. You will hear a double beep, and the “CALIBRATION IN PROGRESS” message will be displayed.
- Screw in the bolt at the bottom of the casing using the provided Phillips mini screwdriver.
The self-calibration typically takes about 1.5 minutes when it’s calm. It may take longer if the boat motion is noticeable during the calibration. The device will keep attempting calibration until it is successful.
Once calibration is finished, a single short beep will sound, and the sea wave data in graphical form will be displayed. The device will begin normal operation.
LIMITED WARRANTY
If, within one year from the date of original purchase, this device is found to be defective in material or workmanship, it will be replaced or repaired at the discretion of the manufacturer.
This warranty excludes:
- Water or chemical damage
- Battery leakage
- Use of wrong types of batteries
- Installing batteries in reverse polarity
- Physical damage
- Use of the device outside operating limits
Please refer to SWR-1 Limited Warranty section for full details.
SPECIFICATIONS
Dimensions: 105 x 105 x 25 mm (4.14″ x 4.14″ x 1″)
Weight: 195 g (without batteries)
Power: 3 x AA (4.5 V)
Display: 4.2″ b/w e-paper (85 x 64 mm)
Timing accuracy (full temperature scale): < 0.1 %
Long-term drift: < 0.001 m per year
Wave height detection range: 0.1 ~ 25 m (0.33 ~ 82 ft)
Apparent wave period: 1 ~ 99 s
Wave parameter accuracy: ±15 %, but not less than 0.1 m (0.33 ft)
Wave counter: up to 1 billion waves ( > 100 years)
Wave history max duration: 24.5 hours
Operating limits:
Max linear acceleration (vertical / horizontal): ±16 g (full scale)
Temperature: 0 ~ 50 °C (32 ~ 122 °F)
WAVE GROWTH NOMOGRAM
The wave height can be forecasted using the wind speed, duration, and fetch utilizing the Gröen and Dorrestein Wave Growth Nomogram (1976).
Hs Forecasting Example:
Consider the average wind speed of 10 m/s over a period of 9 hours.
First, follow the curved Line A, representing wind speed, until it crosses the vertical Line B, representing wind duration in hours. Then, from their intersection, follow the horizontal Line C and read the wave height on the left vertical axis: 1.8 meters.
This would be a good estimation if the fetch was at least 100 km (Line D). If the fetch was only 30 km, continue following Line A until it intersects with Line E. Then, from their intersection, follow the horizontal Line F and read the wave height on the left vertical axis: 1.2 meters.
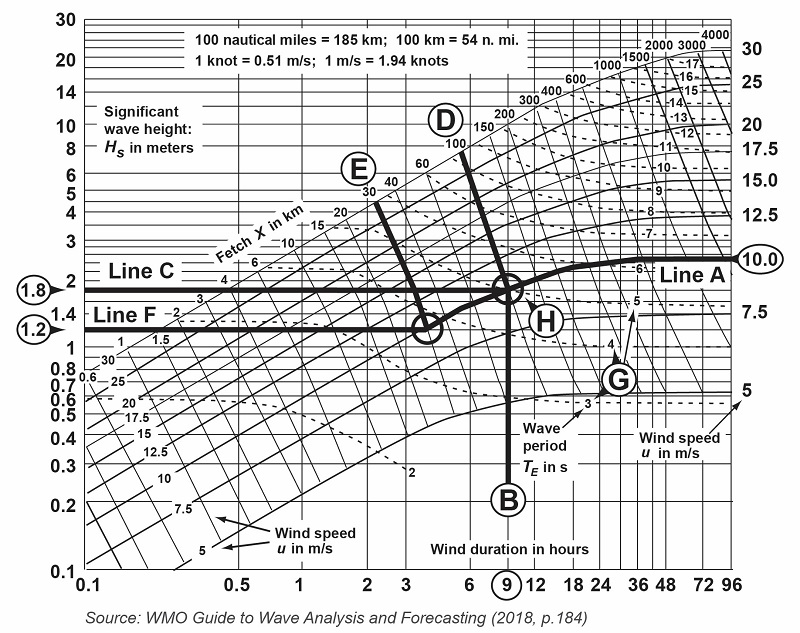
After about 36 hours, the waves will reach their maximum height and won’t grow more, even if the same wind speed persists throughout the days.
The wave period can be estimated using the small dashed lines (G) on the nomogram. For instance, the wave period will be about 5.0 seconds after 9 hours (H) for Line C, and it will increase up to 6.3 seconds when the waves reach their maximum height.
PACKAGE CONTENTS
- Steamrock SWR-1 sea wave recorder 1
- Owner’s manual 1
- AA batteries 3
- Phillips mini screwdriver 1
- Stainless screws 2